Lesson summary on the topic "Circle. Circle"
Tasks:
1. Form an idea of a geometric figure: a circle.
2. Reinforce the idea of the size of two objects: large, small.
3. Continue to teach how to determine the relationships of objects by quantity: one, many.
Demo material: boxes - large and small.
Handout: circles - large and small.
Progress of the lesson
The teacher invites all children to hold hands in a circle.
Educator.
The teacher places a box in the middle of the circle containing large circles.
- Take one circle at a time. Look at him.
- What figure, Sasha, do you have in your hands?
- What are you holding in your hands, Vera?
The teacher asks several children this way, reinforcing the name of the geometric figure. Then he places in front of the children a small box containing small circles.
- Take one circle from this box. Come in and sit on the chairs.
- What is the name of this figure? (Circle.)
—Are your circles the same size? (Different.)
- What are your circles? (Big and small.)
- Show me the big circle.
- Show me a small circle.
- Look at these boxes. What can you say about their size? (One box is large, the other is small.)
- Put the large circles in a large box, and the small circles in a small one.
- What did you do?
Children explain their actions. The teacher removes one box. Then shows the children one circle.
— I have a figure in my hands. What is it called?
- How many laps do I have? (One.)
- Now look in the box. What's in there?
— How many circles are there in the box? (A lot of.)
The teacher invites all children to hold hands and form a circle.
Stand up, children, stand in a circle, stand in a circle.
How beautiful everything is around, everything around.
- Here we have a circle.
The teacher thanks the children and the lesson ends.
Lesson summary on the topic: “Circle. Circle".
Course "Mathematics and Design"
Yulia Vladimirovna Prisyakar – primary school teacher
Lesson topic: "Circle and Circle"Didactic goal: introduce students to the concepts of “circle” and “circle”Lesson type: "Discovery of new knowledge"Lesson objectives:
Get a theoretical and practical understanding of the circle and circle as geometric figures; develop practical skills - use a compass;
Development of mathematical speech, observation, logical thinking, increased attention to the issue under study, independence in educational activities, formation of educational work skills;
Cultivating accuracy, instilling the ability to work together;
Teaching methods : productiveForms of organization of students’ cognitive activity: -frontal, steam room, groupMeans of education: -PC, multi-projector, interactive whiteboardTechnological map of the lessonLesson stage
Organizing students to study a problem situation1 .Listen and guess the riddle:An animal came through the doorSo hungry:Ate a broom and a broom,Ate the rug on the floorCurtains on the windowAnd a picture on the wallLicked a certificate from the tableAnd again it went to the garden. (Goat)
2 .Look carefully at the picture on the slide.- What kind of figure does the platform that the goat plucked look like?-How did the goat get such a platform? Let's read the dialogue between Misha and Masha.
Leading to the “discovery” of new knowledge through stimulating dialogue 3. Starts a conversation, demanding detailed answers:- What is a peg?to which is the rope attached?- Can the goat Squirrel pinch all the flowers inside the circle?
4.
When all the grass within the original circle has been plucked, how can Squirrel be given the opportunity to pluck fresh grass?
Make a plan to achieve the goal and determine the means2 .Look at the picture on the slide and read the dialogue. Masha and Misha“Why did our goat Squirrel pluck out a flat area? “She doesn’t know geometric figures,” Misha asked his sister.“We hammered a peg to tie Squirrel. This is the center of the circle in which the Squirrel will graze. They tied a rope. The squirrel cannot move away from the center more than the length of this rope. This is exactly how a circle is made in geometry,” explained Masha.
3 .-Center of the circle.-Maybe. No matter where the flower is inside the circle, the rope will not interfere with it. The length of the rope is greater than the distance from the center of the circle to the place where the flower grows.4. Children give answer options (choose on the slide)
a) lengthen the rope;
b) shorten the rope;
c) move the peg to another place;
3. In order to draw a circle, you need to draw its boundary.- What does the border of a figure mean?- What is the border of the rectangle?-What can the border of a circle be called? -That's right, guys, this boundary is called a circle. And in order to construct a circle in a drawing, they use a special tool called a COMPASS.The compass consists of two legs, at the end of one there is a needle, and at the end of the other there is a stylus. We hold the head and turn the compass.Are you familiar with this word?- Absolutely right. We know how to write the word “compass”. Today we will learn how to work with a compass.-Considerdrawing and explain how circles are drawn using a compass.
Guys, do you think it is necessary to observe safety precautions when working with compasses and why?.
2 . You can draw a circle using a rope. If you fix one end in the center and go around with the other end, you get a circle.-The rope can be replaced with a stick.- Yes. If two guys hold hands, one of them stands still and the other walks around him, you will get a circle.3. Children make assumptions.
The border of a rectangle is its sides.
This border is calledCIRCLE.
In Russian language lessons we learned the meaning of this word and its spelling.
Children explain how to work with a compass and why it is necessary to work with it carefully.
Independent work. Carry out self-test, step by step comparison with the standard . In order to correctly draw a circle you need: 1. Mark with a pencil the point where the compass needle will be located (this is necessary so that if the compass needle jumps off this point, it can be easily determined) 2. Place a point on the plane of a sheet of paper, designate it O - the center of the circle. 3.align the end of the needle with point O. 4. We make a circular movement with the leg of the compass.Children construct and paint the circles.
Formation of a holistic system of leading knowledge on the topicGuys, which of you was in the circus?-What is the name of the place where the artists perform?- What shape does the arena have?- Why is the arena shaped like a circle?-Why was this particular form chosen?-What size is the arena?(Video “Galileo” Issue No. 127)
You may know that not only in the circus are the arena shaped like a circle, but also in some sports, athletes perform on round platforms. What are these sports called?
Game "Circle or Circle"
-lid,-bagel,-plate,- steering wheel,-ring,-bracelet,- CrapMirror
Goals and objectives of the lesson:
- Introduce new concepts (circle, circumference, radius, diameter).
- Learn to use a compass to draw a circle.
- Conduct a safety briefing on the rules for using compasses and scissors.
- Strengthen the ability to solve problems and examples.
- Develop computational skills, attention, logical thinking, memory.
- Foster hard work and discipline; partnership; accuracy and caution when using compasses and scissors.
Lesson format: workshop.
Equipment: Textbook “Mathematics” 3rd grade part 1/ Comp. M. I. Moro, M. A. Bantova, G. V. Beltyukova, S. I. Volkova, S. V. Stepanova. Publishing house M.: “Prosveshchenie”, 2003; figure models; compass; scissors; glue; colored paper; sample application.
During the classes
І. Class organization.
U: Let's create a good mood for each other. How did you do that?
We smiled at each other.
We wanted to get a “5”.
And I promised to help those who find it difficult.
I wish you success in your work.
U: What is the motto of our work?
D (in unison): Everyone helps everyone, everyone helps everyone.
U: I wish you to do a good job, create beautifully, carefully.
II. Setting the topic and goals of the lesson.
U: We continue to work in our workshop. The topic of the lesson is written on the board (closed). We must recognize it and set goals for ourselves.
1). Decipher the recording, arranging the answers in descending order, and you will recognize the word. To do this, you need to increase each of the numbers by 9 times.
Answer: 
2). Decipher the recording, arranging the answers in ascending order, and you will recognize the word.

In groups, students think about what the topic of the lesson is.
T: - Who guessed what the topic of the lesson was? (Children call.)
I think we'll learn about the circle.
And I think that we will learn about the circle and remember what we know about the circle.
U: Well done, guys! You guessed it right. Today we will also learn how to use a compass to draw a circle. We will also learn new concepts: radius and diameter.
III. Working on the material covered.
U: All educational tasks are accepted, but first we will train attention and memory.
Do exercise 5, page 95 yourself:
Option 1 – 1 line; Option 2 – line 2; Option 3 – line 3.
Mutual testing is carried out as follows: children of the 1st option of the 1st group check the work of the children of the 1st option of the 2nd group and vice versa; children of option 2 of group 1 check the work of children of option 2 of group 2, etc.
Write a rating in the margin.
IV. Working on new material.
1). Work from the textbook, p. 94.
W: You have been familiar with the circle since childhood. Where can we find a circle?
I saw a clock face in the shape of a circle.
And I ride a bicycle, and the wheels are also in the shape of a circle.
The telephone also has a circle that we rotate when dialing a number.
W: That's right, guys. The canning lid is also shaped like a circle. (I show.) The boundaries of any circle are circle. The rubber band that can be removed from the can lid (I show) is a “circle”. Read the rule about circles in the textbook (p. 94) and say what you learned about it.
2). Conversation about the compass. Safety rules: “Rules for using compasses and scissors.”
A compass is a drawing tool. You need to work with it carefully. You cannot bring the needle to your face and you cannot pass the compass to your neighbor “needle first.” Scissors should also be used carefully: do not bring them to your face, pass them to your neighbor with the “blunt end,” i.e., with rings.
T: Tell me the rules for using compasses and scissors.
(Children talk.)
U: Which leg of the compass is in the center of the circle - a needle or a stylus?
I think there should be a needle in the center of the circle.
Of course, a needle, because the stylus is supposed to draw.
U: The sharp end of the compass should always remain at one point, and the distance between the legs of the compass should not change. You need to hold it by the tail, not the leg.
(The teacher marks the center and shows it on the drawing.)
T: Which leg does the compass draw with?
D: The compass is drawn with a stylus.
T: Read about this in the textbook, page 94.
U: The legs of the compass move. What needs to be done to draw a larger circle - move them apart or move closer?
I think that the legs of the compass need to be spread apart.
No, I think they need to be moved closer.
You're wrong: if you move the legs of the compass closer, you'll get a small circle, but we need to draw a larger circle.
U: You guessed correctly, Alyosha. To draw a large circle, the legs of the compass need to be spread apart. Try to draw the largest circle that will fit on your sheet. (Students draw the largest circle, note who did it better in the group.) And now the smallest one you can get (on the same sheet, anywhere, maybe inside a large circle).
3). Making an application on colored paper.
Materials: applique sample, compass, colored paper for the base, glue, scissors.
Group 1 needs to make an applique “Little Ostrich”.
Group 2 – “Chicken” applique.

Children make an applique on a sheet of colored paper. Details are completed with a felt-tip pen. You can draw a background or grass, the sun.
V. Physical education minute.
U: Now let’s rest a little.
Hands raised and shook
These are trees in the forest.
Arms bent, hands shaken
The wind blows away the dew.
Let's wave our hands to the sides, smoothly -
These are the birds flying towards us.
We’ll also show you where they sit –
The arms were bent back.
4). Task 1, page 95. Read carefully.
Draw and cut out any circle and make sure by folding that the diameter divides the circle in half. Color half the circle. How many halves are there in a circle?
Material: compass, paper, scissors.
T: Draw any circle. Cut out a circle, marking the center (pierce it with a stylus). Bend the circles so that the center is on the fold line. How many halves are there in a circle?
The circle was divided into two parts.
It turned out to be two halves.
T: Paint half the circle. What parts did you get?
I think the same parts.
I think so too.
It seems to me that the circle was divided into equal parts.
W: Why do you think they are equal?
They fit if you attach one part to the other.
I understood why the parts are equal, because they fit together.
U: Well done. What is the fold line?
It is even and smooth.
She's straight.
U: That's right, the fold line is straight. Does it have a beginning and an end?
W: What is it called?
It seems to me that this is a segment.
I also think this is a cut off.
W: That's right, guys. Well done. Look, I will still build several segments in this circle. How does the first segment differ from all the others? (The teacher makes a few more folds in the circle parallel to the diameter.)

W: What else is interesting about this segment? How is it different from all the others?
D: It goes through the center.
U: This segment, which runs from the edge of the circle to the other edge through the center, is called - diameter. Of all the segments connecting two opposite edges of a circle, the diameter is the longest.
Read about diameter in the textbook, page 95.
5). Exercise. Drawing on the board.
T: Select in the drawing on the board those circles in which the diameter is drawn.

T: How many diameters can be drawn in a circle?
I think there can be many diameters.
And I think so too.
U: How long are they all?
They are identical.
You can also say equal.
T: Bend your circle along the diameter. (Children add.) You got a semicircle. Now fold the semicircle in half. Where is the center of the circle? Show it. This figure that we received has its own name - sector. Expand your circle. Run your finger from the center of the circle to its edge along the fold. This segment is called, in a word radius.
How many radii are there on your circle?
I got 4 radii.
I also have 4 of them.
U: What are the lengths of all the radii? Check with a compass.
D: - The radii are the same.
T: Read about radius in the textbook, page 94.
6). Task 2, page 95. Read the task.
Measure the radius of each circle and draw circles with the same radii but with the center at the same point.
The guys work independently.
7). Independent work. Problem solving.
2 students decide at the board.
Option 1 solves problem 3, p. 95
Option 2 solves problem 4, p. 95
Self-test.
The teacher evaluates the students' work, and the group leaders help the teacher.
VI. Lesson summary. Reflection.
T: Throughout the lesson you were active and attentive.
Have we coped with the assigned tasks?
D: Yes, we did it.
T: What did you like most about the lesson?
I liked solving examples and problems.
And I liked drawing with a compass.
And I like to work independently.
I enjoyed making the applique. They turned out beautiful for us.
I also liked drawing with compasses and making appliqué.
W: What do you remember about the circle?
I remembered that it can be drawn using a compass. They must be used carefully and carefully.
A circle is also the boundary of a circle.
T: How does a circle differ from a circle?
D: We said that a circle is the boundary of a circle. A circle is the area enclosed by a circle.
W: What do you remember about the diameter?
Diameter is a segment that runs from the edge of a circle to the other edge through the center.
This segment is the longest. It connects two opposite edges of the circle.
You can draw as many diameters as you like in a circle. They will be the same.
U: Well done, guys. What is radius?
This is a segment connecting the center of the circle with some point on it.
The radii are equal.
U: And now I propose to make another application. The poster features a circus elephant. He loves to juggle balls, but today he has no balls. You have colored paper on your table. You will draw a circle that you like, cut out the circle and paste it like this:
- red circle if you enjoyed the lesson;
- blue circle – I didn’t like working in class;
- green circle – I didn’t really like it.
(As a result, out of 10 people in the class, 10 red circles were pasted.)
W: Thanks for the lesson. I really liked the way you worked.
The teacher announces the grades.
VII. Homework.

Galina Durinova
Summary of the “Circle” lesson for children with disabilities.
Summary of the “Circle” lesson for children with disabilities.
Durinova G.V., teacher-speech therapist.
During the lesson, children sit in a circle on chairs or on the floor. Various rhythmic games used in the “Circle” have a positive effect on children with special needs. They contribute to adaptation, the development of communication, the emotional-volitional sphere, and imitative activity. All games are played very emotionally. Games that correspond to the lexical topic being covered can be used.
Tasks:
Development of imitation
Development of active imitative speech activity,
Activation of visual and auditory attention,
Stimulation of the child’s tactile interaction with other children,
Development of the ability to switch attention.
Structure:
Greetings,
Imitation games,
Rhythm games,
Sensory games,
Ending.
Materials: toys (lion, mouse, pig, bell, cube and images of musical instruments, tablet folder (2 pieces), cards with a photo and the name of each child, pictures with conventional images of natural phenomena.
Progress of the lesson:
1. Greeting. We put chairs in a circle and sit down. We hold hands: “Good morning everyone, everyone, everyone!”
2."Who came to kindergarten? L. has a clipboard and cards with a photo and name of each child. The speech therapist shows the card:
Who came to kindergarten? (Child's name is called)
Who (child's name)?
Etc. we call all the children
3. “What’s the weather like?” L. takes the tablet, a folder and pictures with conventional images of natural phenomena.
It's autumn time of year now. What's the weather like today?
Children are shown pictures depicting natural phenomena and name them.
It's rain. Let's show how it rains: drip, drip, drip. It's raining. The rain goes on and on and on. The wind makes a noise like "sh-sh-sh".
We looked out the window. Is it raining today? (Children answer “yes” or “no.” If “yes,” then they hang the picture on a tablet folder. We ask about other natural phenomena.)
In all games with toys, the toys are placed in the center of the circle after the game is announced.
4. Playing with a bell.
Bell.
I'm running, running, running, (the child gets up, runs around the “circle” and rings the bell, the rest sit and clap their knees)
I'm carrying the bell.
I'll put the bell in your hands,
And I’ll sit down myself. (child sits on a chair)
Who will you give the bell to? (the bell is passed to another child, he runs, a song is sung)
5. “We are hunting a lion.”
Part 1
We're hunting a lion (slap our knees)
We are not afraid of him
We have a huge gun (raise one hand up)
Whack-Whack (we move the fist of one hand over the palm of the other and vice versa)
And a red-hot sword, one, two. (put your hands together, touch them first to one shoulder, then to the other.)
Part 2
What's up ahead? (we make a visor from the palm above the forehead)
So free-flowing, so hot. (touch the index finger of the left hand to the palm of the right)
This is the Desert.
We can't fly over the desert, (hands together, raise them up)
We can't crawl under the desert, (hands together, lower down to the floor)
We can't get around this desert, (we spread our arms to the sides)
The road is straight ahead. (hands together, make a movement straight in front of you - away from you)
We walk through the desert “chic-chic-chic” (rubbing palms together)
Part 1
What's up ahead?
So green, so muddy.
So stinky. (hold your nose)
This is a Swamp.
We can't fly over the swamp,
We can't crawl under the swamp,
We can't get around this swamp,
The road is straight ahead.
We are walking through the desert. (with the index fingers of both hands, we alternately raise the corners of our lips and smack our lips)
Part 1
What's up ahead?
So high, so hard, so cold. (raise our hands up, knock on the chair, rub our shoulders)
We can't fly over the mountains,
We can't crawl under the mountains,
You can't get around these mountains,
The road is straight ahead.
We're going through the mountains. (with our palms, we knock ourselves on the upper chest and make the sound “Ah-ah”)
Part 1
What's up ahead?
So soft, fluffy, (circular movements with hands near the head)
toothy, fanged. (show “teeth” with hands)
Let's run!
In the mountains. (showing mountains)
Through the swamp. (show the swamp)
Through the desert. (show the desert)
They ran away from the lion. (we run our hand over our forehead)
6. Sensory game “Pig”.
Piglet.
Who wants to be a pig? (The child lies down, the others stroke him)
Dear mom and dad
Give us flour and salt,
We baked a pig
They baked it, and he squealed (Tickle the child)
7. Game "Cube" with musical instruments
(We pass the cube around. The child who has it when the song ends chooses a musical instrument)
The cube is rolling in a circle,
Pass the cube to a friend.
The cube can tell
What should you play on now?
What do you want to play?
(Pipe - let’s sing “doo-doo-doo.”
Spoons - “knock-knock-knock”.
The drum is “bom-bom-bom.”
Tambourine - “Boom-boom-boom.”)
8. Game "Mouse".
One day a mouse climbed in (We bend down to the toes, and move our hands along
See what time it is. legs, torso, rise to the head)
Suddenly the clock struck: “bang!” (Clap over your head once)
The mouse rolled head over heels. (We clench our hands into fists and twist one around the other)
The mouse climbed in a second time
See what time it is
Suddenly the clock struck: “bom, bom!” (Clap over your head twice)
The mouse rolled head over heels
The mouse climbed for the third time
See what time it is
Suddenly the clock struck: “bom, bom, bom!” (Clap above your head three times)
The mouse rolled head over heels.
8. End. Let's join hands. “Thank you very much everyone!”
Bibliography:
1. Averina I. E. Physical education minutes and dynamic pauses in preschool educational institutions: practical work. allowance / I. E. Averina. – M.: Iris-press, 2008.
2. Game activity “Circle” by Yu. G. Zarubina, M. G. Popova ( http://www.osoboedetstvo.ru/files/book/file/zarubi01.pdf)
3. Folklore games in an inclusive kindergarten. A. Fondorka, music director. E. E. Leontyeva, teacher-defectologist ( http://refdb.ru/look/1603603-p20.html)
Lyubov Kutyrina
Summary of mathematics lessons in the middle group« Magic circle» .
Goals:
Introduce planar geometric figure: circle and its properties.
Develop the ability to see objects in the environment that are similar to circle.
Strengthen ideas about spatial relationships (right left).
Train mental operations: analysis, comparison and generalization.
Develop attention, speech, imagination, motor and tactile memory.
Progress of the lesson:
Guys, every person has a family. These are the closest and dearest people. Who does your family consist of? And today I want to tell you about the hare Kasyan. He also has family: hare and little hares. He and his family live in the forest. One day the hare Kasyan went to pick mushrooms and saw that a wheel was lying on the ground. The hare wants to take the wheel home, but he doesn’t know if it’s possible. I flew past a magpie that knew everything in the forest. She said that the wheel was no one's. Kasyan decided to take the wheel home. I tried to lift it, but I couldn’t, it was very heavy. What do you think the hare should do to bring the wheel home? (the wheel needs to be rolled home). Kasyan rolled the wheel home. Bunnies rejoiced: “What a big coin! What a big button! A Kasyan speaks: “This is not a coin or a button. This is the wheel".
Guys, what do all these items have in common? Let's look at the items you have (coins, buttons, rings). Children examine and manipulate objects. Right. The wheel, button and coin are rolling. They have the same shape. This is what we will talk about today. Listen poem:
I have no corners
And I look like a saucer
On the plate and on the lid,
On the ring, on the wheel.
I am an old friend to people.
They call me - circle.
Look around attentively -
You'll definitely see it.
I attach it to a magnetic board circle. Let's think about what objects are similar to circle(plate, clock, cake, etc.). I also brought items round shape(stand, box, saucer, brooch) Look at the two strings in front of you. What color are the threads? (brown and black). What else can you say about them? (the brown thread is long and the black thread is short). Let's make it out of strings circles. What kind of results did you get? circles? (small and large) Why circle from brown thread more than from black (the thread was longer) Circle finger circles.
Physical education minute:
There is a rope on the floor. Let's make it out of her circle.
Stand up children, stand up circle,
Stand in circle, stand in circle,
You are my friend and I am your friend
The best friend.
Making it big circle, small, circle at the top, at the bottom.
Guys, the hare Kasyan received a letter from his friend the bear. The bear sent a drawing of a cart that he made himself (I attach it to the board). For some reason the cart doesn't move. The bear asks why his cart is not moving? (because it has triangular wheels) How to help a bear? What does he need to do? (change the wheels to round) Hare Kasyan will write to his friend and tell him what he needs to do. The bunnies received an assignment at the forest school. They study too circle. Let's help them complete the task. Place a large one in front of you red circle, to his right yellow circle. To the left of the red one put green circle. To the right of the yellow is a small red circle. How much in total put circles? (four) How many red put circles? (two) Show me the biggest one circle. Show me the smallest one circle.
Now look at the pictures and tell me which objects round Are the shapes shown on them? ( round table, round mirror, round button, round cake, round brooch)
You guys are great. We learned a lot about circle and learned to find it among other figures. Now let's make a postcard for our hare Kasyan. I'm showing you. This is a cheerful hare who rides a bicycle and has balloons in his hands. Let's stick on these colorful balloons. Children stick on balloons.
Related posts:
 Lesson summary on the topic "Circle"
 Find out everything you need to know about this form.
 How to write a letter about changing the purpose of an incorrect payment
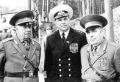 Epishev's feat, or ten days that shook the USSR Air Force Army General Alexey Alekseevich Epishev
 Sick leave in the new calculation of insurance premiums How to reflect 1 sick leave in the RSV


